Please note: this software has been superseded by the EHR Connector add-on, which has a dedicated MedTech32 add-on.
Installation
You will need to install the MedImage Server version ( >= 1.3.8), and for testing purposes, we would recommend trying this on a test server or PC, first, to check everything works in your environment. Please back-up your MedTech database before first use – our add-on shouldn’t adversely affect anything, but it is always a safe policy. You can do a file-level back-up, and we would recommend doing this process out-of-hours, so that no users are currently accessing the MedTech32 system.
Once the MedImage Server is installed, you should download and install the MedTech add-on from
http://medimage.co.nz/addon-
To download this, click ‘Start the Free Trial’ from that page – it will take you to the download section.
You can download both the Server software and the MedTech add-on as many times as you need to run it on your system. If you don’t find it works in with your set-up, please let us know and we’ll see how we can help. MedImage support is available if you need on-site or remote assistance in installing this. Please remember that the license is per hardware server, so you will need to purchase a new copy if you plan on running the software on a new site.
For our current approval status by MedTech for this product, please see this page.
Post Installation Set-up
Once the installation is complete the MedImage Server software will pop up in a browser with the MedTech32 add-on settings page showing.

Scrolling down further:

The general approach here is to configure, ‘Save & Check connection’, configure, ‘Save & Check connection’, etc. until you have a green ‘Connection Success’ message showing.
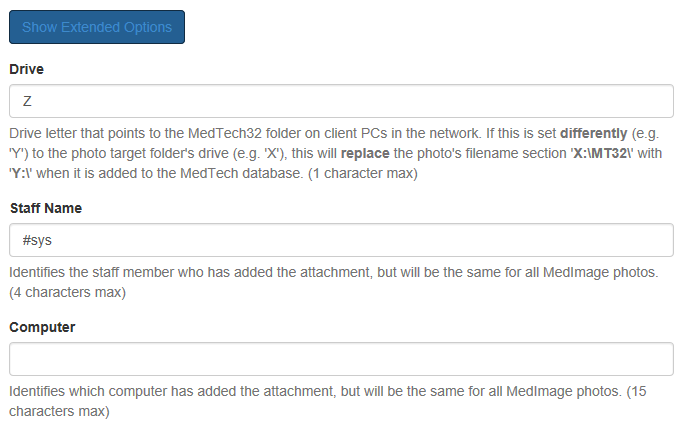
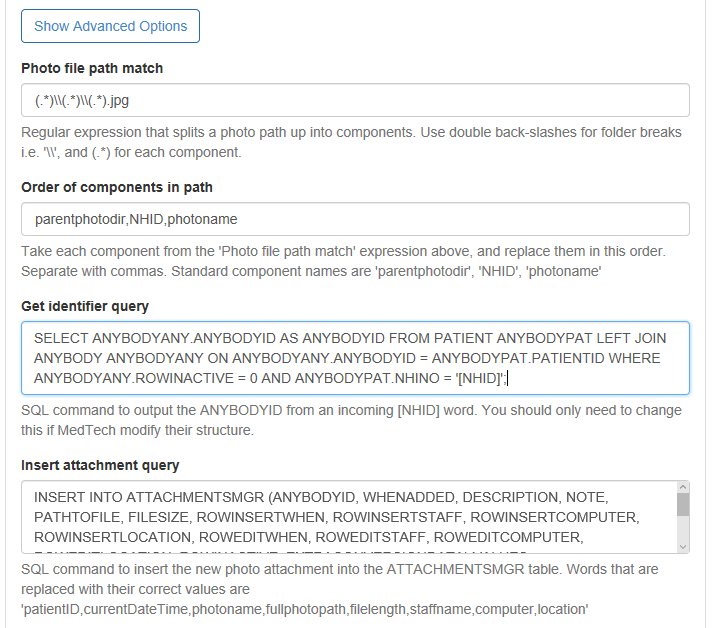
You can preview the ‘Show Extended options’ in this picture, and the ‘Advanced Options’ in this picture.
Be careful of:
- If the MedImage add-on settings for ‘Show Extended Options/Drive’ have been changed from the default ‘C’, the photos will only be visible when you click the link within MedTech32 on client PCs, not the server itself (since the file reference will be from e.g. M:\Attachments\…). However you can work around this:
- You can switch the ‘Drive’ setting in MedImage back to ‘C’ on a single machine installation of MedTech32
- Or, on the server you can run the following in a cmd prompt: ‘subst M: C:\mt32’ which maps the drive M: to the folder C:\mt32 on your server.
- If the standard ‘native’ connection does not work when connecting to your MedTech Interbase database, you should try to connect via the ODBC connection method. There is no difference in the end-result, but the ODBC method is simply more involved to set up. There are several different ODBC drivers on the market that work with Interbase, and two are installed by default with the MedImage MedTech Add-on: the Embarcadero Interbase ODBC driver is the best option (called ‘Interbase’ in your Windows ODBC options), although the Firebird ODBC driver is also a second option, which is included. If none of these work, you will need to login to https://www.embarcadero.com/products/interbase with your account, or create a new account with them, and download & install an ODBC driver to perfectly match your Interbase system.
- Once this ODBC driver is installed, you need to create a ‘system’ DSN connection to your MedTech32 database through the Windows ODBC page (enter ‘ODBC’ under your Windows start bar). Make sure you use the 64-bit version or the 32-bit version, depending on the Interbase software installed. There are instructions for specific fields in the MedImage add-on settings page under the ‘ODBC Guide’ link. Test the connection within the ODBC driver to ensure it is working. Then add the name of your ODBC connection back into your MedImage MedTech32 settings page. Save and check the connection once more.
Once you have successfully connected to your MedTech32 database you are ready to try sending images from your MedImage phone app to MedTech32.
Using the app
The app can be used in much the same manner as you would without the add-on installed, but you should be aware of the following:
The preferred format to enter is ‘#[NHID number] [injury name]’, for example ‘#BGDH1233 arm’, or if you have the app option ‘ID writes a folder’ on, you can ignore the ‘#’ at the start and enter simply e.g. ‘BGDH1233 arm’.
This will create a folder for each NHID number, and include multiple photos within it. While it is possible to modify this recommended structure (under the ‘Advanced Options’), you will need to be technically capable to do so (i.e. have a knowledge of, or the aptitude to learn about ‘regular expressions’).
Once a photo has been sent, you should initially check the status of the photo transfer in the MedImage Server interface, under the ‘MedTech Log’ link on the left-hand-side. This page provides an up-to-date log of success or failure, that is refreshed every few seconds. It can take a few seconds from when the app mentions the photo has transferred successfully, to the entry getting displayed here.
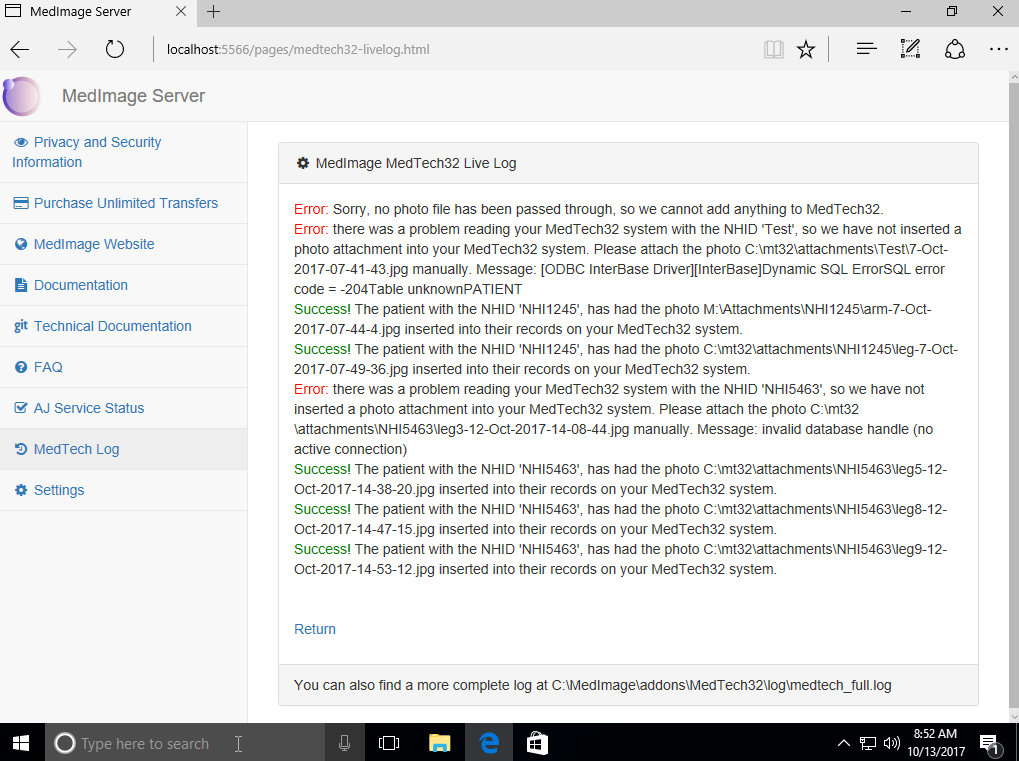
Please note:
- You cannot send a photo to an ‘inactive’ NHID number
- If an NHID number is duplicated, this will return an error, and you will need to manually add the photo to MedTech
- If nothing appears at all on this log, please check your internet connection from your server
Once you have a green ‘success’ message on this log, you typically wouldn’t need to keep referring to the log page (unless you find a photo has not arrived, of course).
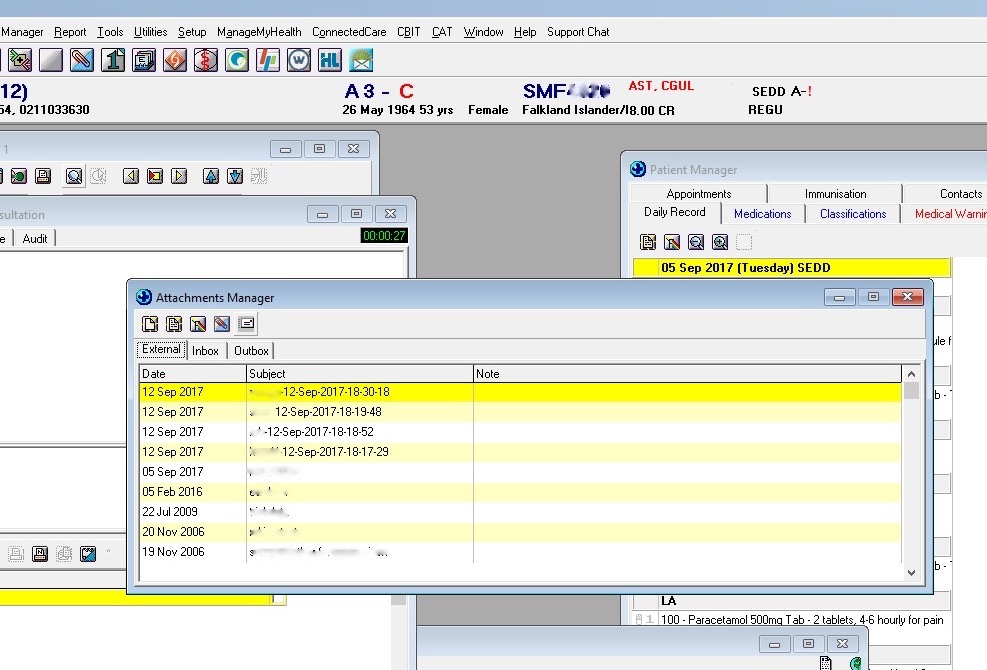
You then need to close and re-open the ‘Attachments Manager’ for that patient, from within MedTech32. The new photo should be visible, and clickable.