Installation
Installation
If you are a nurse, please start by clicking the ‘Taking a Photo’ button below:
For system installers, continue with this section:
Please read the Wound Mapp security advisory before beginning.
You will need to install the MedImage Desktop version ( >= 1.7.4).
Once the MedImage Desktop is installed, you should download and install the Wound Mapp add-on from
To download the package, click the ‘Download free trial’ button, which will take you to the download section. We offer a 30 day free trial.
Note:
- MedImage support is available if you need on-site or remote assistance in installing this.
- Please remember that the license is per desktop, so you will need to purchase a new copy if you do plan on running the software on a fresh desktop, and consider an Enterprise version if a single server handles multiple sites.
- You can download both the Desktop software and the Wound Mapp add-on as many times as you need, without getting in touch with us.
Common Setup
Generally, with a desktop version, you would each use the same shared network folder on a shared network drive to hold the photos. This may have already been set up by your local IT team (e.g. ‘D:’ drive in your Windows Explorer), or alternatively, you could use a secure ‘cloud’ based Windows network drive service, e.g. Google Drive File Stream which provides a local ‘G:’ Windows network drive, but is stored remotely. You should agree among your team on a target folder within your drive for the photos.
Note: On some network services, such as Google Drive File Stream, you may need to run your “MedImage” service as your own user, rather than the “Local System” user. To change this, open your “Windows Services”, right click on “MedImage” and click properties. Click the “Log-On” tab and then click “this Account”. Enter your current Windows user credentials.
The default password for the Wound Mapp software is ‘changeme’.
But you should change the password in the C:\MedImage\config.json file. We recommend using Notepad++ to do this, and restart the ‘MedImage’ Windows service afterwards.
Note: This software will store a version of your photos in your MedImage/photos folder, as well as a version in your target destination folder, if they are different. If you require a different target folder, your storage requirements will be doubled. However, in a shared drive case, photos that all users see are stored once on the network drive, and only photos that an individual sees are stored on their local desktop drive.
Post Installation Set-up
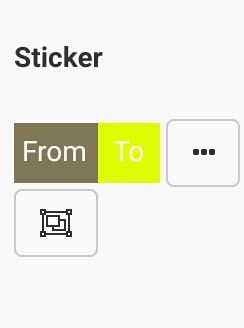
To calculate the area of the wounds, you will need to place a known sized sticker within the photo, next to the wound. This gives a measurable guide within the photo that can be extrapolated to calculate the size of the wounds in the photo.
You will need to choose a standard sticker type to use across your organisation. This should be a circular shaped single-colour sticker, of a known and fixed size.
The default colour and size configuration is for a light yellow 14mm diameter sticker from the manufacturer Esselte, although there may be better options, and it will vary from country to country. When choosing a sticker try to select one that has:
- A bright, bold colour that is not likely to appear on a body, or near a wound (or, for that matter, in a typical natural background shot). While bright blue seems to work better than green or yellow in our experience, if you are using blue hypoallergenic gloves, a bright yellow or green may be a better option. It should create a fairly consistent colour within a photo.
- A matt surface, so that reflections or folds in the sticker don’t affect the colour in the photo, when light is shone directly against the sticker
- Easily detachable from the skin, whilst leaving behind very little residue. The residue should not be able to infect a wound.
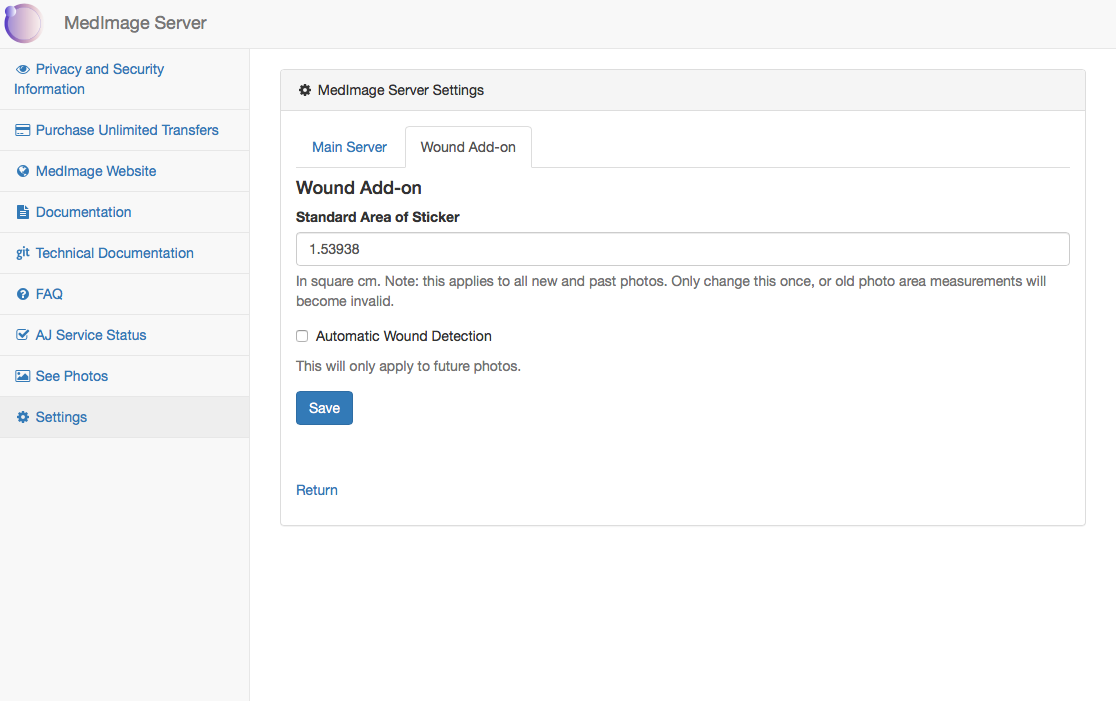
To calculate the standard size of your sticker in square centimeters (and if you’ve forgotten your high school maths!), you can search Google for ‘area of circle’. There is a quick sizing calculator there, but please use the ‘more details’ options to get at least 3 decimal places, and remember that your figure should be in square cm, not square mm. Enter this in the Settings ‘Standard Area of Sticker’ option.
In our live tests, automatically detecting the boundary of the wound based on the colour was a challenging task for the computer to do, and we have therefore removed this option. Instead, the approach is for the nurse to trace around the photo immediately after it has been taken.
Typically, if you are the administrator, you will need to take a few photos of your chosen sticker under different lighting conditions, and make your sticker’s colour ranges global, before nurses begin using the package. This process is described below under the ‘Adjusting the colour matching’ section, but take particular note of the ‘Making a colour range global’ section, so that your users will find it pre-configured to auto-detect the stickers you have chosen.
Once you have configured these options, you may choose to set the option ‘lockDown’ to ‘true’ in your C:\MedImage\config.json file, to prevent users changing these settings from their own browsers. See the Technical Guide for further details.
Taking a photo
Install the ‘MedImage‘ app, or ‘Wound Mapp‘ app to your phone or tablet. This costs US$10 (or US$20) per phone respectively, but is a one-off payment.
1. Connect your app to your MedImage Desktop using the standard instructions here.
2. We would recommend entering an NHID or similar health identifier for the patient in the text box before taking the photo. Usually you would also have the ‘ID writes a folder’ option set on in the app, which is the default. This saves having to enter ‘#’ at the start of each ID to create a folder on the server for the patient’s photos, which allows the photos to be searched for by the patient identifier, later on.
Here are some examples of what you might want to enter:
nhi1234 arm
This would write a photo called ‘arm-[date/time].jpg’ into the folder NHI1234
nhi1234 #arm
This would write a photo called ‘[date/time].jpg’ into a subfolder NHI1234\arm, which would allow you to see all of the ‘arm’ photos alongside each other, on the server.
Or with ‘ID writes a folder’ option set off, this would be
#nhi1234 arm
and
#nhi1234 #arm
3. Place the sticker on the patient near the wound. Your camera should be placed at right angles to the surface of the wound, and the wound should cover a reasonable proportion of the whole photo. If the wound wraps around the body, the area measurements will not be accurate – and our tool will not handle this case properly, but you can still take a photo to document the wound over time.
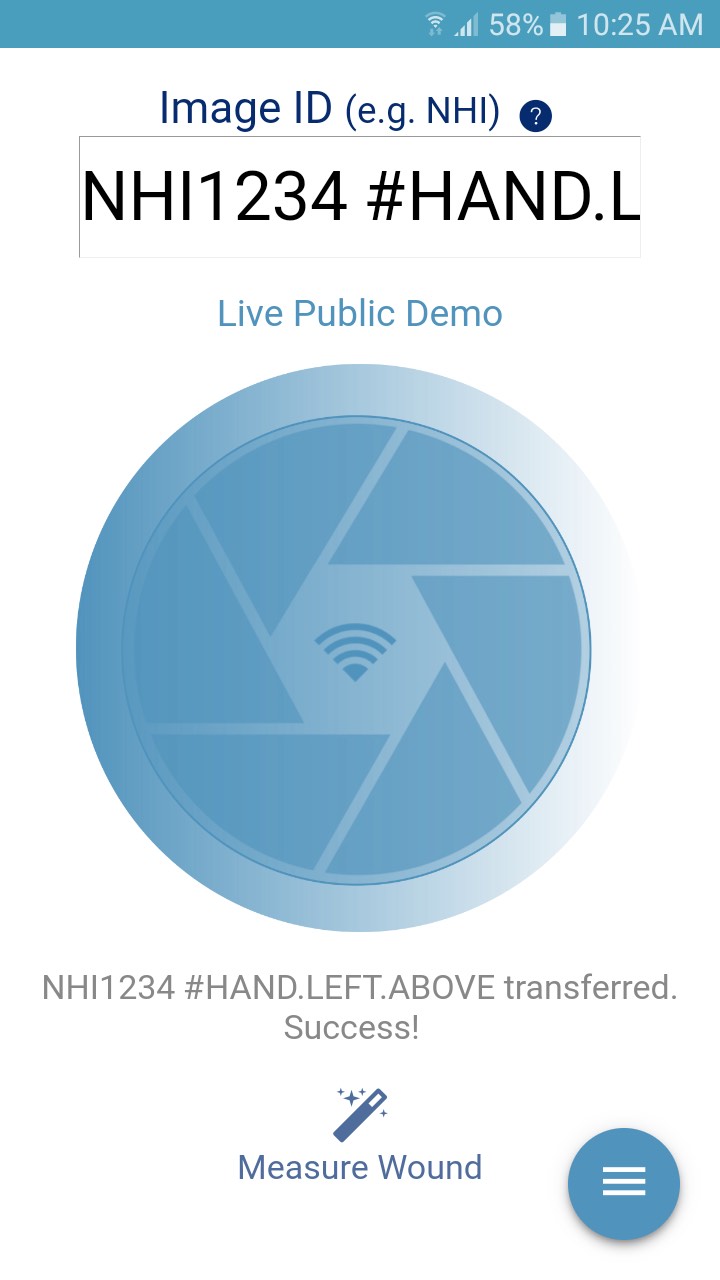
4. Click the huge ‘Camera’ button to take the photo, as described here.
Once the photo has been shown as ‘Image Transferred. Success!’ you should switch across to your installation of MedImage on your desktop, which could either be found from a desktop ‘MedImage Server’ button, or at a particular address in your browser that your system admin will give you e.g. ‘http://localhost:5566’.
If you have an address, this can be copied into a web browser address bar such as Chrome, Firefox, Edge or Internet Explorer.
Analysing the Photo
The software will ask for a password before letting you search.
The default password for the software is ‘changeme’. However, this is insecure, so please change this. You will find instructions in the ‘Installation’ section, above.
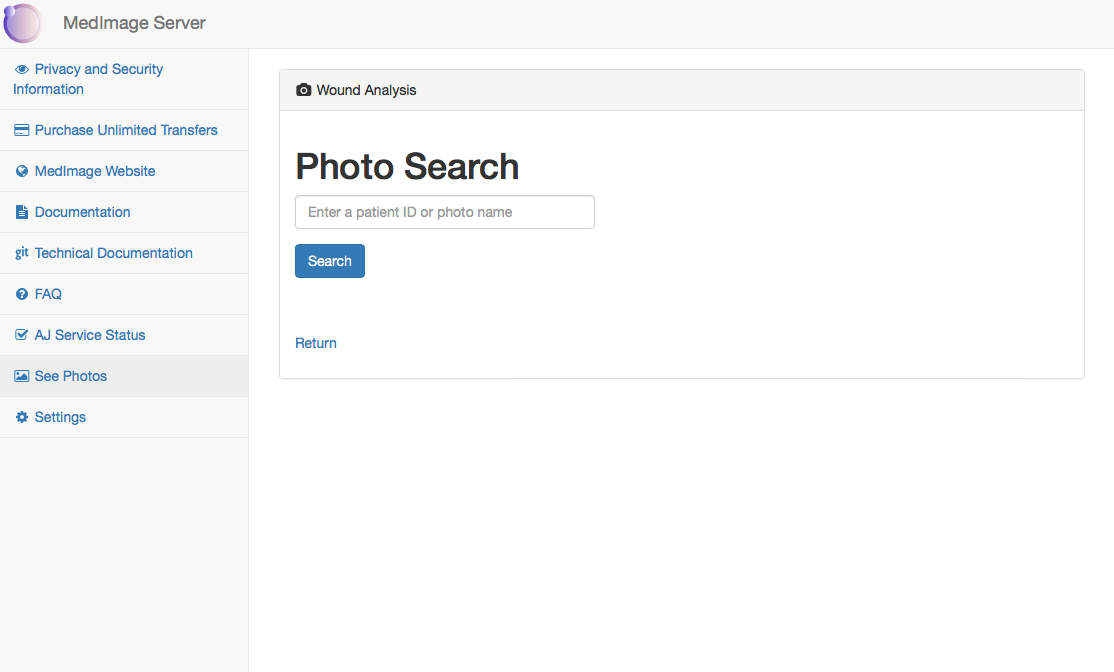
Within your PC or installation of MedImage Server, click ‘See Photos’ on the left hand menu. Start typing the patient ID or photo name, and after a few moments potential options will pop down:
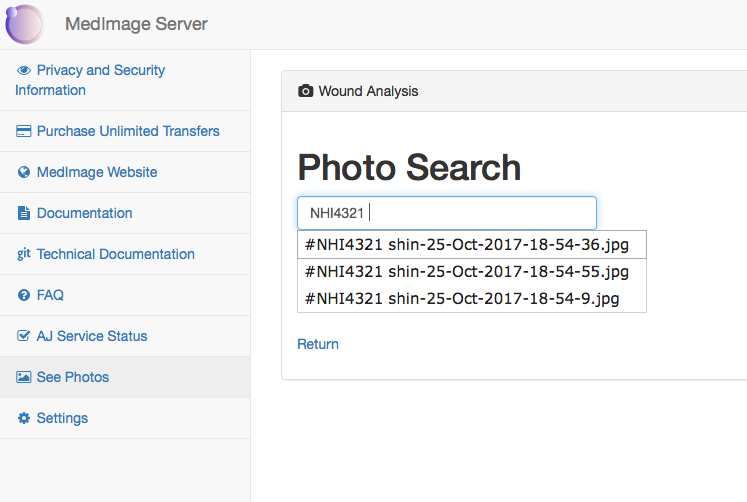
Select a folder or a specific photo. If you select a folder, you will see all of the photos taken within that folder e.g.

From here you can compare the sizes of wound in the different photos, or select them for closer analysis. The file names will give both a date and a time. If you are looking for the photo you have just taken, you will probably not have an ‘area’ value at this stage. Click the photo you have taken.
If you selected a particular photo from the search box, it will take you through to that photo’s analysis screen, e.g.
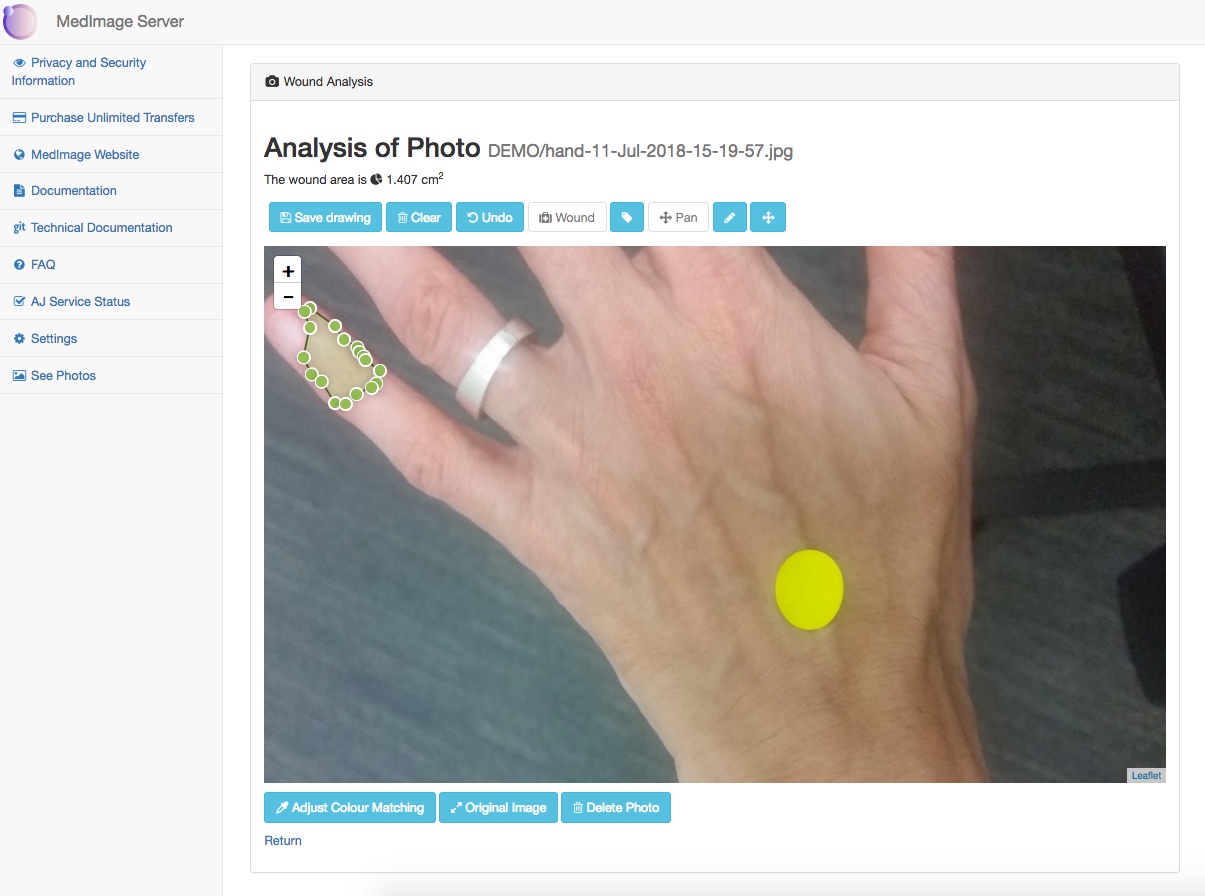
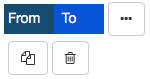
If the sticker has not been automatically detected, it will have a message ‘[Please draw around the sticker]’, and you will be taken into the sticker drawing page initially. With your mouse, trace around the sticker and fine-tune. You can switch between drawing the sticker and drawing the wound using the icons above the photo, and once you are done, you should switch to the wound. Alternatively you can adjust the colours by clicking ‘Adjust Colour Matching’ at the bottom of the page (see the ‘Adjusting the colour matching’ section below) to try to match the sticker automatically.
With your mouse, pen or finger, trace a circle around the wound – the area you wish to measure. Click ‘Save’ to save the shape, and recalculate the area, or ‘Undo’ if you make a mistake. You can delete all drawings with ‘Clear’, or adjust their boundaries by moving the border points. If you click in the middle of an area, that area will be removed.
You can make multiple drawings, and the wound area calculated will be a sum of all areas. Each individual area should ideally be a closed shape, without overlaps, although it is not always necessary to fully close the line when you draw it.
If there are multiple wounds that you wish to track the area of, we currently recommend that you take multiple photos – one photo for each wound.
Once you are happy with the area selected, click save and you will see an area in square centimeters at the top of the screen.
Note for IE users: to draw several areas over the wound, draw one area, click the left mouse button within the zoomable area, and then you can draw a second area.
Note for mobile users: the mobile interface appears slightly different to the desktop version, and is built for using your fingers during tracing. You can expand and pinch with two fingers to zoom in and out of the photo. The green button is the save capability, which will show the area on the same screen. You can switch back to the desktop version if you need all the features, but this will not support finger tracing.
You can also view the original full-scale image in your browser by clicking ‘Original Image’, or adjust the colour matching by clicking ‘Adjust Colour Matching’.
Using Advanced Layers
While in the basic case you only need to draw around the wound and the sticker, you can also select two other options:
- Undermining which represents a wound under the skin. This will be added to the total area of the wound, except when it overlaps with the external wound area. When the two internal and external areas overlap, the overlapped area is only added once to the total measurement. If you do include undermining, you will see a break-down of the area calculations, which includes both the undermining and external areas, and the total area.
- Epithelial Islands which represent internal areas of the exterior wound that have healed. The total area of these islands will be subtracted from the external wound area in the overall area calculation.
Adjusting the colour matching
The automatic colour matching is always attempted when detecting the sticker, but sometimes it will not work, and a nurse will need to manually trace around the sticker itself. You can improve the rate of auto-detection for your sticker by using the colour matching tools.
Note: If you are not the system administrator, we recommending asking before changing either the global colour ranges, or the wound detection option in the settings, because it affects all users of the system moving forward.
There are ‘local’ colour ranges, which are specific to this photo, and ‘global’ colour ranges, which are detected in all future photos, by all users of the system. You can edit the colour ranges for this photo first, and choose whether other users want this colour range too, if they are generic.
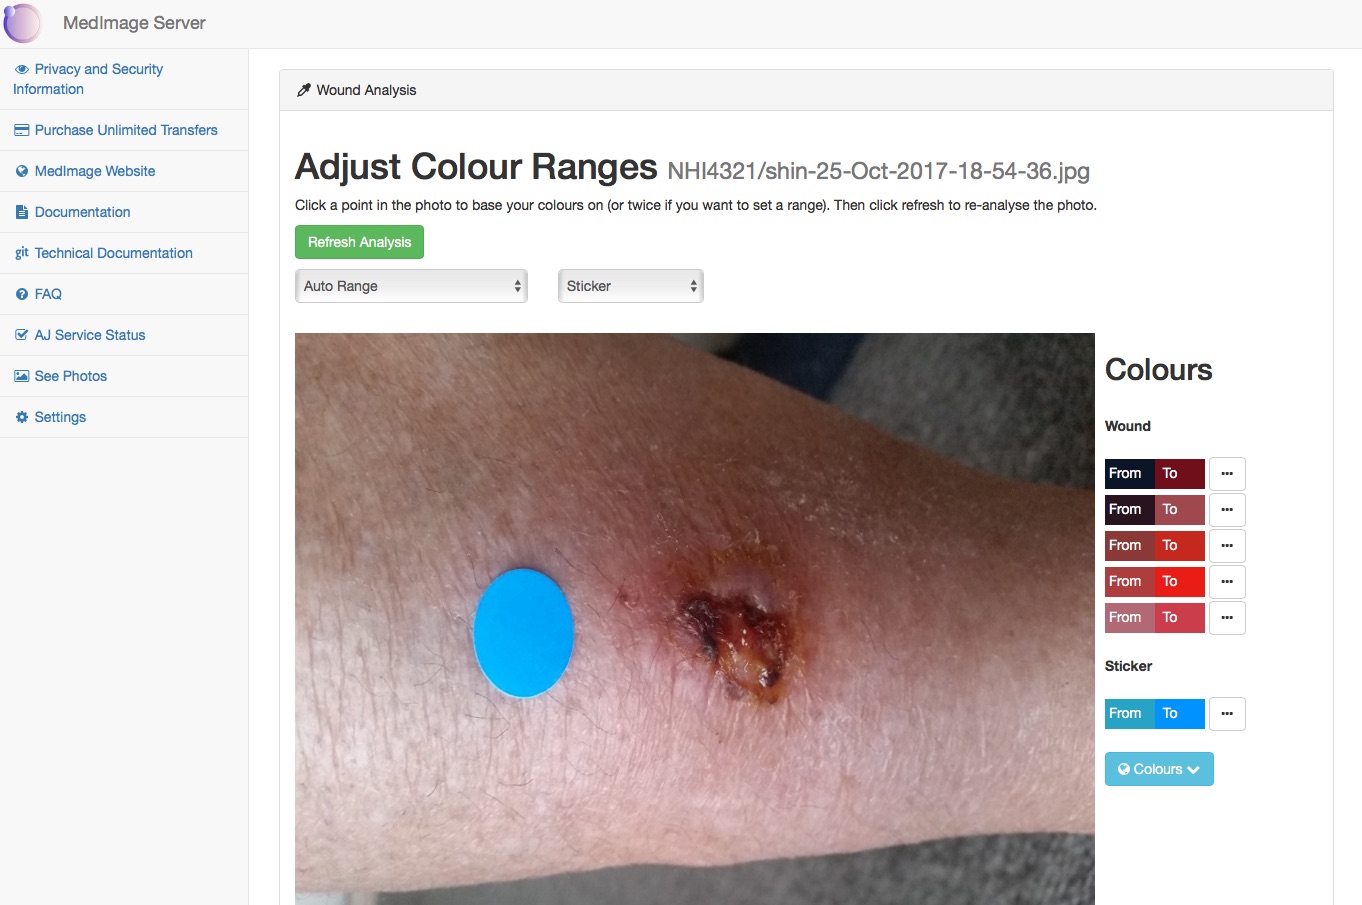
To adjust the colour ranges:
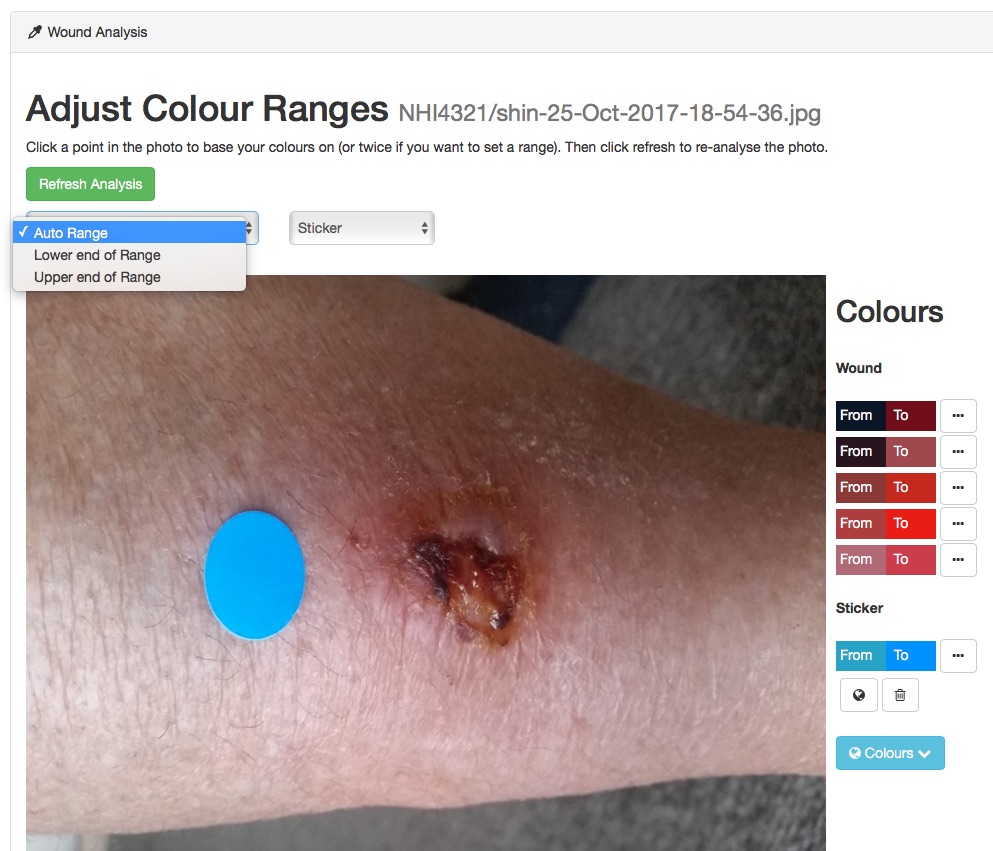
- Select which method of colour you want to adjust, either ‘Auto Range’, ‘Lower end of Range’, or ‘Upper end of Range’. The ‘Auto Range’ is the easiest option, and it will take an automatic range around the colour that you click on the photo (from darker to lighter with your chosen colour in the middle of the range). If you choose ‘Lower end of Range’ you can manually define the specific range, but you will need to click on the photo a second time – first to set a dark colour, and then second to set a light colour from the photo (‘Upper end of Range’ will be automatically selected after the first click).
- Select whether this colour applies to the sticker or the wound.
- Click the colour from within the photo itself, and after a page refresh, the new range will appear on the right hand side, for this photo. Click a second time to finish the range, if this is not an ‘Auto Range’. If you wish to delete the range you have entered, click the button next to it ‘…’, and click on the ‘rubbish bin’ button.
- Once you are happy, click the green ‘Refresh Analysis’ button to re-analyse the photo with these new colour ranges. If this detects the item correctly, you may want other users to have access to this colour range, although we would recommend asking your adminstrator first before doing this. Each new colour range slows down the analysis slightly. You can see the global set of colours used by clicking the light blue ‘Globe Colours’ button.
Making a colour range global
Global colour ranges are used by all new photos. If you add a new global colour range, past photos will not be affected, unless the ranges are copied down for each photo, and then re-analysed, manually.
To transfer a colour range to the global colour range lists, click the small button next to the range, and then click the small globe button.
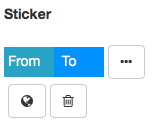
To go the other way, click the light blue ‘Globe Colours’ button to reveal the global colour ranges. You can remove colour ranges from the global ranges by selecting the range and clicking the ‘rubbish bin’.
Or, if you want to copy a global colour range down to your local photo, click the ‘…’ button next to the range, followed by the ‘copy’ button. You would usually only need to do this if there are new global colour ranges that have been added since you took the photo.
Grouping colour ranges
You can group ‘local’ or ‘global’ colour ranges by tapping the group button underneath them. This will create a single new colour range that covers the extremes of all the current colour ranges. You have the option of adding this new range to the list, or replacing all the current colour ranges.
This is a useful way of speeding up the colour matching (each range will take a small amount of time, so generally the fewer the better), and make it more consistent. The button will only affect either the ‘local’ photo, or future ‘global’ photos, depending on the heading it is under.
Exporting and Reporting
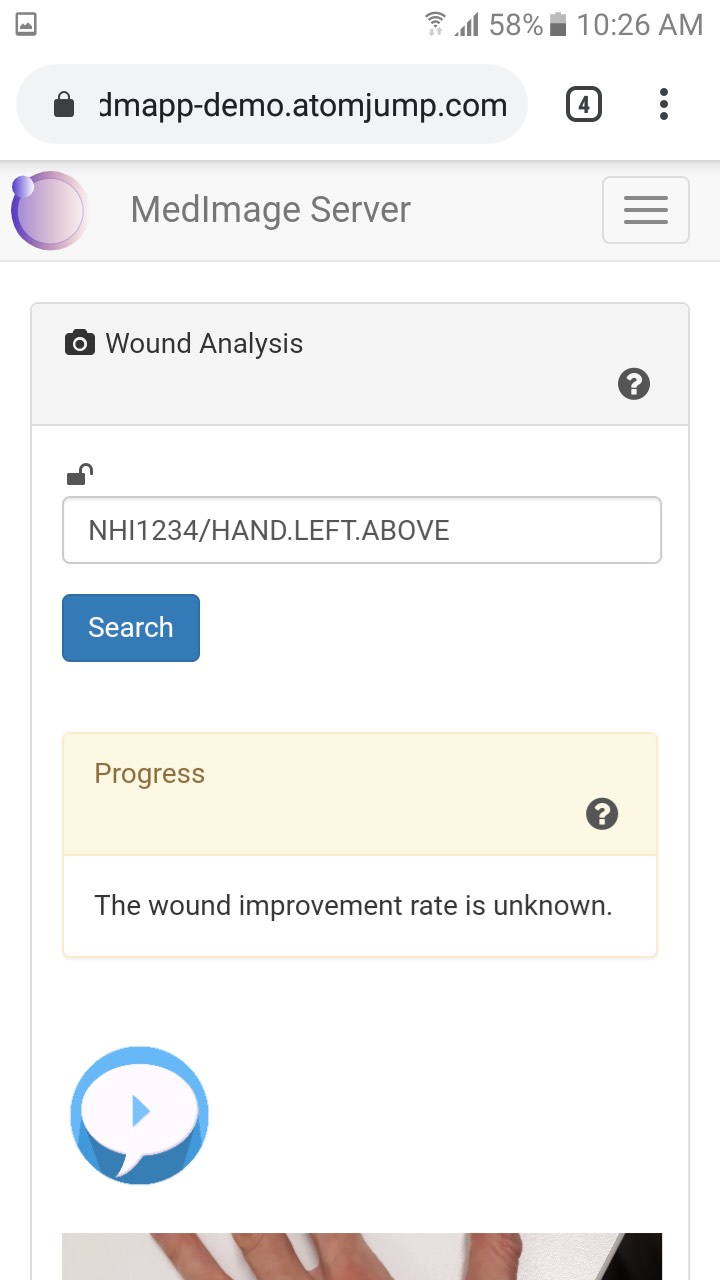
Wound Improvement Messages
These messages will appear at the bottom of a search results page for a particular folder, to give you a quick warning if the wound is not getting better.
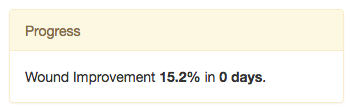
The rules used are:
By default, use a yellow box.
If improvement < 30% after 14 days, make the box red.
If improvement < 0% from start to finish, make the box red.
If improvement > 97% from start to finish, make the box green.
Photos
Your photos are available in your selected target folder (or C:\MedImage\photos) on the server machine that is running MedImage Server. You can also access the main photo by clicking ‘Original Image’ in a photo edit screen. Then, depending on your browser, right clicking and selecting ‘Save Image’ or similar, will download the original photo to your desktop.
Export a PDF Version of a Wound’s Progress
You can turn the wound’s progress pages into a shareable .pdf. There are several commercial tools available that can do this, such as NovaPDF. The tool needs to be able to convert a web page into a .pdf. Please be careful with privacy – e.g. you wouldn’t want to share private patient details via a 3rd party conversion service, so use a local piece of software.
On an Android phone, you can also click the ‘Share’ icon on a wound progress page, in the top right corner, and select ‘Convert to Adobe PDF’ to be able to share the pdf with an external party. This requires a subscription with Adobe. There may be other apps available on Android which offer this service, also.
Meta-Data
Within the settings/Wound tab, you will find an ‘Export’ button. This will export all photo meta-data in .csv format, for import into a spreadsheet. This spreadsheet will not include the photo’s .jpg files themselves. You can use e.g. Microsoft Excel or Google Sheets to import this data, or any software that reads csv files.
Included fields are:
Filename, Id, Subfolder, WoundName, AreaSqCm, WoundType, ExternalSqCm, UnderminingSqCm, ImprovePerc, Period, Status, ExternalImprovePerc, UnderminingImprovePerc, ServerDateTime
Which in a spreadsheet might look similar to:

Meta-Data Fields
Filename is the full image path away from the photos folder (without the .jpg extension).
Id is the first word entered by users of the app, which is often an NHID (within New Zealand) or some other identifier.
Subfolder is a second folder name for subcategorizations e.g. leg or arm. In the app you would enter e.g. ‘id #subfolder’ to get this.
WoundName is the name of the wound. In the app you would enter e.g. ‘id woundname’, or ‘id #subfolder woundname’ to get this.
AreaSqCm is the area in square centimeters, if known, of the wound. Other messages, such as ‘[Please draw around the sticker]’ can appear in here. If there is any wound undermining (i.e. under the skin wounds), then this is the combined external and undermining area.
WoundType is a classification of the wound, in free text. You will find a .csv file of these classifications in C:\MedImage\addons\wound\wound-types.csv.
ExternalSqCm is the area in square centimeters, if known, of the external wound (as opposed to the undermining, internal wound). If this is not applicable, because there is no undermining wound, it will be ‘[NA]’.
UnderminingSqCm is the area in square centimeters, if known, of the undermining wound. (i.e. under the skin). If this is not applicable, because there is no undermining wound, it will be ‘[NA]’.
ImprovePerc is the percentage improvement of the area of the wound. It is calculated from the photos in this folder, since the time of the first photo in the folder. If some areas of the photos are not known, they are not included in this calculation. If there is any wound undermining (i.e. under the skin wounds), then this is the combined external and undermining improvement.
Period is the period since the wound was first photographed. This is calculated from the ServerDateTime field, and is in English e.g. ‘1 day’ or ‘2 months and 10 days’. Technical Note: be careful if you copy your photos to a different server, that you retain their ‘date-created’ information, at the operating system level. E.g. in Linux, use the ‘-p’ option when copying a folder i.e.
cd oldphotosfolder
cp -Rp * newphotosfolder
Status can be ‘recovering’, ‘recovered’, or ‘warning’. Recovering means the wound is getting better. Recovered means they have fully recovered ( > 97% improvement). Warning means the wound is getting worse, or has not improved by more than 30% after two weeks.
ExternalImprovePerc is the percentage improvement of the area of the external wound, by itself (as opposed to the undermining wound). It is calculated from the photos in this folder, since the time of the first photo in the folder. If some areas of the photos are not known, they are not included in this calculation. If this is not applicable, because there is no undermining wound, it will be ‘[NA]’.
ImproveUnderminingPerc is the percentage improvement of the area of the undermining wound (i.e. under the skin), by itself. It is calculated from the photos in this folder, since the time of the first photo in the folder. If some areas of the photos are not known, they are not included in this calculation. If this is not applicable, because there is no undermining wound, it will be ‘[NA]’.
ServerDateTime is the time in GMT (Greenwich Mean Time) that the server recorded the photograph. This could be offset from the time-stamp in the file name itself by up to a day due to different time-zones, or a few seconds due to the delay between the photo transferring from the phone to the server.
Disk Data Format
In the master folder is a list of subfolders which represent each patient. If there have been any global configuration changes (i.e. different from the default configuration), there will also be a master.json file which has the global configuration for this installation. This file will be shared with other connecting MedImage desktops, if photos are being exported to the same shared folder.
Each subfolder is typically named by the ID of the patient (although this depends on what users have entered). Within each of these folders are photos, or potentially further sub-folders with breakdowns of the body location e.g. ANKLE.LEFT.UPPER, if the Wound Mapp app has been used.
Each photo is named:
| [optionalname]‑[date/time].jpg | The original, full resolution photo that the phone sent. In standard .jpg format. |
| [optionalname]‑[date/time].web-view.jpg | A smaller version of the photo suitable for display on a web screen, or being easily emailed. It will not have finer details but is good for overviews. |
| [optionalname]‑[date/time].thumbnail.jpg | The smallest version of the photo (displayed in the folder search screens), with the wounds traced over. |
| [optionalname]‑[date/time].json | A .json data file with all measurements, data, and polygons of that one photo’s wounds, as traced over by the operators. It also includes colour ranges used to scan for the sticker. To edit or view this file, install ‘Notepad++’ first. Then right click the file and select ‘Edit with Notepad ++’. Although you can potentially make changes, please use caution before doing so. This is generally best left as a machine edited file. If you do make changes, it is worth using a ‘JSON validator’ tool before saving the file. |
Adding Messaging
This option allows the addition of the open source AtomJump Messaging solution to allow an ongoing live discussion forum around particular wounds. It also includes a common ‘global’ forum for flagging particular cases to the whole team.

Tap the blue chat speech bubble next to a wound to open the chat window. You can do this on mobile or desktop, in your browser, and also receive notifications if you install the AtomJump Messaging app. Please refer to the messaging user guide for further details.
You will need to add a link that refers to your own private AtomJump Server in the Wound Mapp settings page to enable the feature.
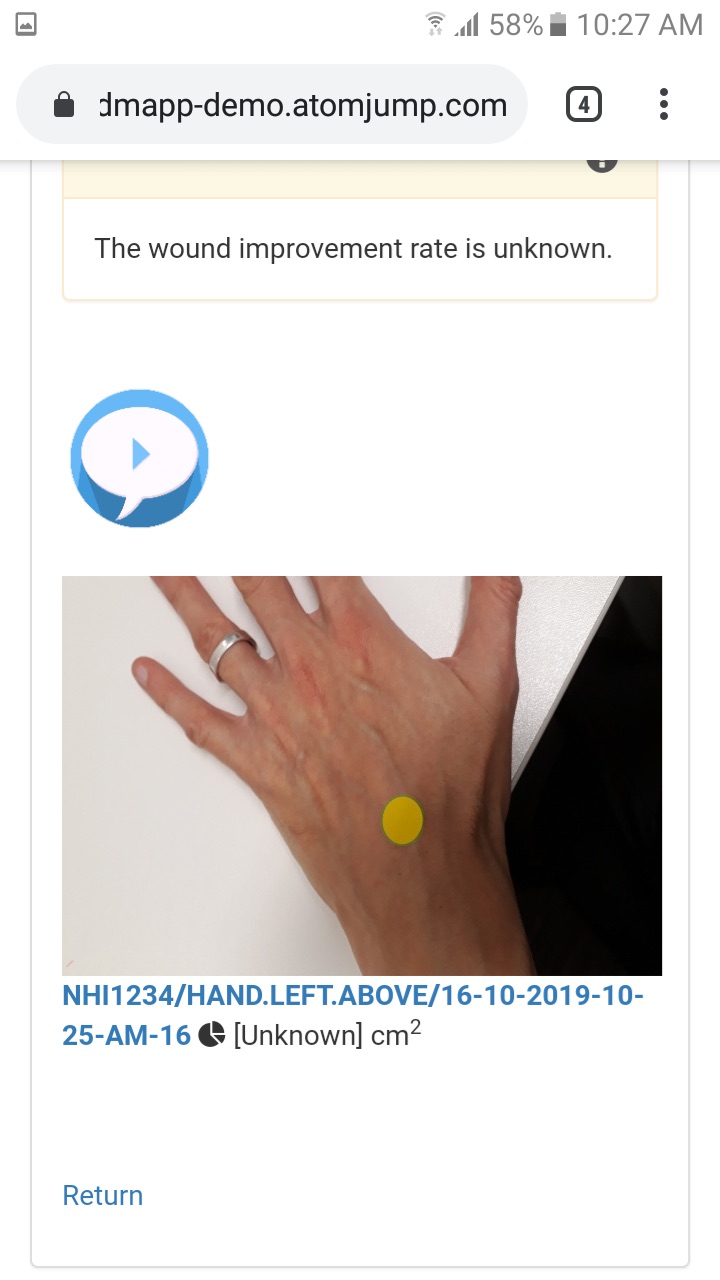
Mobile Area Measurement
The full ‘magic wand’ option is available for users who have the ‘Wound Mapp’ version of the app on their phones, although a search and draw interface is available on any mobile device, through the browser.
Once a photo has been taken, a magic wand will appear on the screen, and clicking this will open the user’s mobile browser with that specific wound available, on-screen. An area measurement can then be done on the phone for an off-premiss, immediate comparison against prior photos of that wound. The user must have a network connection for this measurement to work.
Note: To set this up requires some technical knowledge, so we recommend consulting with your IT department should you wish to have this feature.

Setup
You will need to create an ‘intranet’ address for one of your MedImage Servers, that each phone should be able to view. Ideally, the security access should be limited to the phones themselves. Then, with this server address (i.e. a URL on your intranet) you can copy this into your Wound Mapp add-on settings page. If you already have a synced connection from your app, you will have to re-sync your app connection to include the feature.
Security
Caution should be taken with security measures on the phone, as the password will be remembered on the mobile browser.
Tapping the ‘unlocked’ icon on the wound photos screen above the search box, will log off the interface, after use, which prevents anyone else with the phone from being able to browse the photos. You will then need to enter the password once more on next use.